The Radio Shack antenna looks much like the stock antenna when it's down. Height, when fully extended, is about the same as the stock antenna too. The motor noise is virtually identical to Mazda's -- that is, it's noisy. I'd expect that Radio Shack gets these antennas from a reliable manufacturer, so I don't hesitate to recommend them. I've had one in my '84 for about three years before I sold it, and I installed one into my '85 when I bought that. Both are still working flawlessly. Lastly, if I should ever manage to bend another antenna mast and I can’t find any more of the Radio Shack units, these same instructions can likely be used for other aftermarket antennas. (Tip: READ THOSE SIGNS AT THE ENTRANCES TO AUTOMATED CAR WASHES!) :)
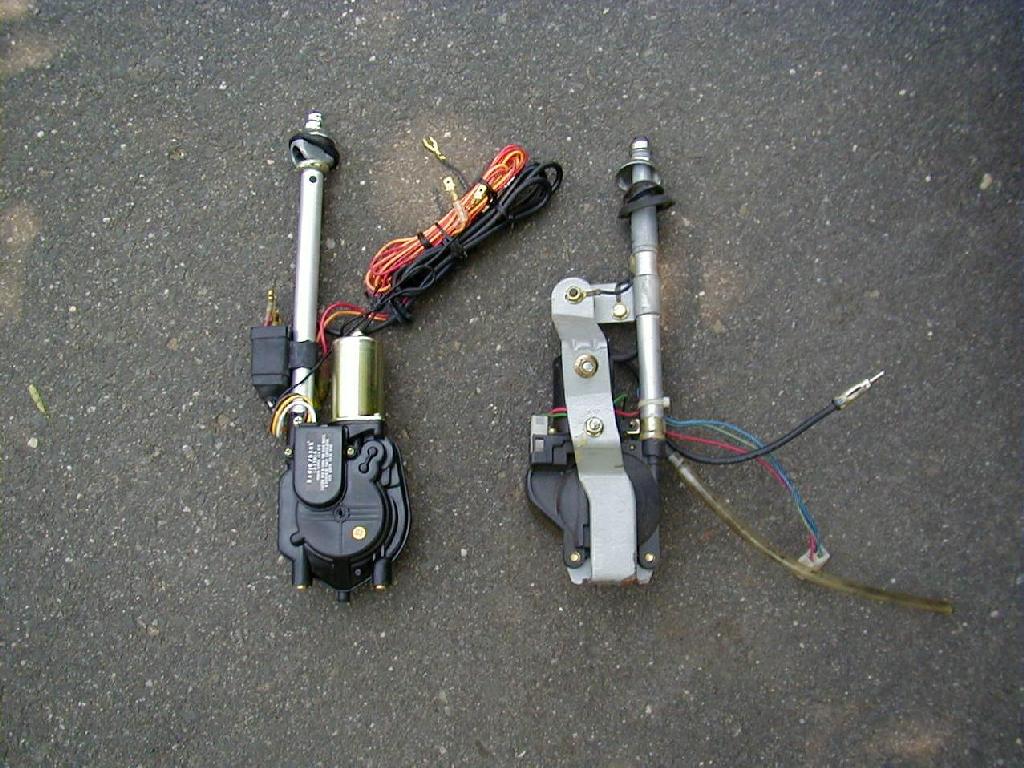
Below are the Radio Shack antenna, on the left, and the OEM Mazda antenna with the mounting bracket installed, on the right. The OEM bracket has four removable bolts on it. The two riveted screws in the middle will still be used to mount your new RS antenna to the body with this old bracket, but the very bottom of the bracket -- where it makes a u-turn, looping back up -- will have to be bent down 90 degrees to get the bolt holes to line up to the bottom of the RS antenna. (Don't break it, or you'll be heading off to a junk yard to buy a new one for $20 or so.) The top of the OEM bracket can be unbolted with the top two bolts and re-installed on the RS antenna. All images below are clickable, by the way.
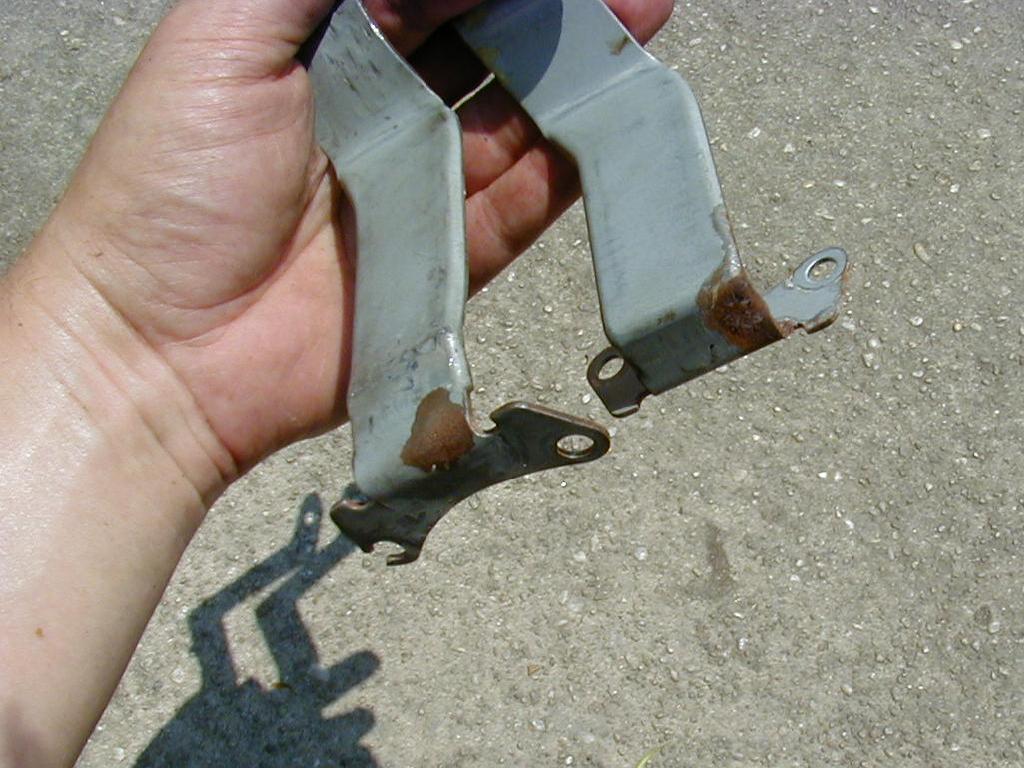
The mounting bracket has a 180 degree bend on the bottom. (right) I partially straightened it to a 90 degree bend, and snipped a portion of one of the bolt holes to accommodate the Radio Shack's bottom mounted bolts. (left)
The finished product.
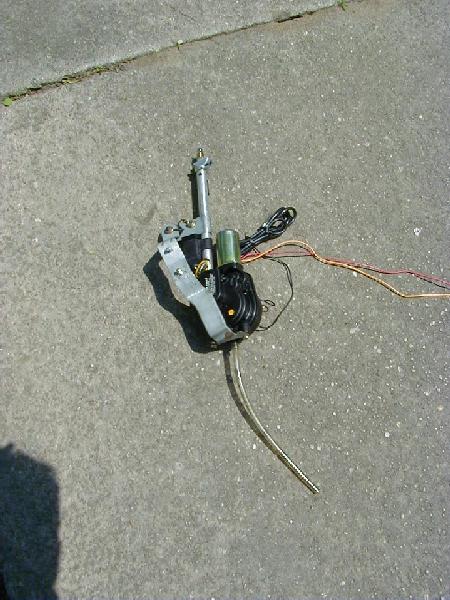
You can see that I had to bend the bottom of the bracket to lean it over in such a way that the antenna mast and studs on the bracket would all line up to the holes in the chassis. Brad Good, from the first generation RX-7 mailing list, recently reminded me of why I chose to do this: I wanted to make sure that both mounting bolts, on the bottom of the antenna, were secured to the bracket. Brad instead chose to use only one mounting bolt, on the left of this picture, and install it through the right mounting hole of the bracket. This is slightly less secure, in my opinion, and may allow a little more flexing of the bracket or vibration that could eventually allow the bolt to back out or the mast nut to come loose; Brad also had to install that single lower bolt after the antenna and bracket were in place in the fender, in order for the whole assembly to clear the tail light hole. But I’ll concede that Brad’s method is certainly easier, and that the bolt or mast nut will probably never come loose. As an added benefit, the backwards leaning antenna on my car is probably more resistant to damage from low branches than a perfectly upright antenna would be.
Like most aftermarket antennas, the RS unit has three leads -- "accessory on" (the orange lead, usually powered directly by a signal from a tuner), unswitched power (red) and ground (black). These are different from the three Mazda leads, and you cannot merely plug them into the wiring harness for the Mazda antenna. The black wire should be easy enough to wire up -- it's just a chassis ground, and I hooked mine up to one of the OEM-turned-Radio-Shack mounting bracket nuts. The red lead must have full time power regardless of whether or not the ignition key is in the accessory or on position. I found a great source nearby the antenna: the hatchback interior light has a full time power lead going into it. If you remove the rear hatch panel, you'll see two wires connecting into the back of the light. The blue/yellow wire (on the light, not on the OEM antenna harness!) is unswitched power -- the switch is a plunger mechanism on the driver's left side of the hatch latching mechanism. Finally, the "antenna up" signal for the orange wire can be used from the blue wire on the original Mazda antenna wiring harness.
As an aside, that blue wire was the most "interesting" part of this whole project. Mazda's OEM antenna is controlled by a relay under the dash. The relay is activated by a fairly common +12v signal from the tuner, but Mazda chose to send a completely different signal back to the antenna, via this convoluted relay. The three wires on the original Mazda antenna wiring harness play a three way shell game between battery positive and battery negative. When the antenna is going up, the blue wire gets battery positive, and the red wire gets battery negative. When the antenna is going down, the red wire gets battery positive, and the blue/yellow wire gets battery negative. So the red lead alternates between positive and negative, the blue wire only sees positive when the stock antenna is supposed to be up, and the blue/yellow wire only sees negative when the stock antenna is supposed to be down. Got that? :) The cool thing is that you don't have to, because most aftermarket antennas have the relay mounted on the antenna, making the wiring logic a helluva lot easier to follow for you and I.
Another little tip: I used tap-in squeeze connectors (Radio Shack part number 64-3053) to connect to these wires without any cutting or soldering. A little electrical tape around the OEM antenna wiring harness would also be a smart idea to keep the hot leads from ever accidentally contacting the chassis. These tips should allow you to retain the stock wiring harness, just in case you or some future owner decides he/she wants to restore the car to totally stock parts.